
Nothing is more frustrating than cutting trees and branches with a dull saw blade. Not only does it slow down your job, but it also poses a great danger. It is important to sharpen a pruning saw to ensure efficiency and safety.
To sharpen a pruning saw, you must first gather the necessary equipment. These include cleaning cloth, clamps, and safety gear. Clean the blade and secure it using the clamp before you sharpen the saw.
However, filing a saw with uneven teeth is not that simple. This article will guide you through every step of sharpening a pruning saw. But first, we will cover the definition of this tool below.
What Is a Pruning Saw?

A pruning saw is a type of saw designed for gardening use. It can cut or prune tree branches and limbs. It can also trim down shrubs and other plants.
Pruning saws a straight or curved blade with sharp cutting teeth. The blade connects to the handle, which is usually straight. However, other saw models have curved handles to help you slice through thick branches.
Most pruning saws cut on the pull stroke. That means you should only use force when pulling the saw through the wood. Pulling the saw toward you also provides better control and efficient performance.
What Are the Different Types of Pruning Saws?
A pruning saw comes in various types, with each one designed for specific tasks. Here are some common types you might encounter:
Handheld Pruning Saw
This is the most basic type of pruning saw available for homeowners and amateur gardeners. It uses a straight or curved blade with sharp, coarse teeth. The blade is available in various lengths to suit different needs.
Handheld pruning saws with a straight blade are popular for cutting sap or green wood. Meanwhile, curved edges can slice through branches and thick bushes with a maximum thickness of eight inches.
Commercial Pruning Saw
This type of saw features a large blade and cutting teeth. It can handle heavy tree branches that are too big for a standard pruning saw but small enough for a chainsaw. Commercial pruning saws are popular among landscapers and professional gardeners.
Pole Saw
As their name suggests, pole pruners connect to a long pole that you hold while gardening. They allow you to reach tall branches and trees that need trimming.
The pole saw has a built-in squeeze mechanism in the handle. It controls the end of the pruner; pressing it will activate the cutting ability of the saw.
Why Do You Need to Sharpen a Pruning Saw?
A pruning saw can become dull due to repeated use and contact with wood. Sharpening this saw is important for several reasons.
First, having a sharp pruning saw improves cutting performance. It can easily and efficiently prune branches. You can achieve desired results and free up your time doing more meaningful tasks.
You can also ensure your safety with a sharp pruning saw. A dull blade is more likely to catch in the wood, which increases the risk of accidents.
Plus, sharpening pruning shears can extend their lifespan. Dull cutting teeth can lead to excessive wear and damage. Protect your investment by keeping the saw sharpened.
Finally, having sharp pruning saws can leave clean cuts on plants, making them heal faster. Thus, they can effectively fight pests and diseases.
How To Sharpen a Pruning Saw? A Step-by-Step Guide
Now that you know how important it is to sharpen a pruning saw, you may wonder how to do it. Here is a detailed guide on how to make your pruning shears sharp.
Prepare the Necessary Equipment
First, you will need the following things:
- Metal file (to sharpen the saw blade)
- A screwdriver or a wrench (to remove the blade from the saw)
- Clamp or vise (to hold the blade)
- Saw set (to adjust the cutting teeth)
- Lubricating oil
- Vinegar and water
- Steel brush or sandpaper (for rust removal)
- Rags or cloth
- Safety gear
It is important to put on proper protective gear like gloves – especially around sharp tools.You might also want to wear safety glasses to keep debris out of your eyes. Boots are another must-have safety equipment. Plus, get a helmet if you are using a pole pruning saw to protect your head from falling debris.
Take the Blade Out Of the Frame
After gathering the required tools and wearing proper safety gear, you can detach the blade from the handle. Doing so makes it easier to clean and sharpen the pruning saw later.
However, note that some types of pruning saws are not detachable. Refer to the product manual for specific features of the saw and directions on removing the blade.
But in general, you want to grab a screwdriver to take the blade out of the frame. Use this tool to loosen the screws holding the blade in place. Then, store the screws in a pouch or plastic to avoid misplacing them.
You can also use a wrench to turn any nuts and bolts that your pruning shears may have. Again, do not lose them because you will need them to reassemble the saw later.
Clean the Debris on the Saw Blade
Once you have detached the blade from the saw, it is important to clean it before sharpening.
Use a wire brush or steel wool to remove dirt, debris, and rust on the blade surface. You can also grab sandpaper with 220 or 320-grit. Work on all the teeth to dislodge stuck-on particles.
Consider submerging the blade in undiluted white vinegar if the saw has stubborn rust. You can leave it in the vinegar bath for 30 minutes to several days, depending on the current rust condition.
After soaking the blade in vinegar, remove it and wipe it dry with a clean cloth. Use a steel wool again to eliminate remaining debris and rust.
Finally, apply a few drops of lubricating oil to the blade. Wipe it with a dry cloth to prevent rust in the future.
Secure the Blade
With the pruning saw blade clean, you can now position it for sharpening.
Place the clamp or vice on a flat and wide surface. Then, secure the saw blade tightly to prevent it from moving. Make sure the cutting teeth are facing upward, so you can easily access them while filing.
Set the Teeth of the Blade
Before sharpening the saw, you must first ensure the teeth have the same width. If not, you risk getting an uneven cut, despite a sharp blade.
You can bend the teeth outward to widen the cut. This process is known as setting the saw. Use a saw set, which contains a vise and pliers, to adjust the width of each tooth.
Start with the first tooth located at the end of the saw. Place the pliers around it and squeeze the handles to set the cutting tooth.
Next, adjust every alternating tooth on the blade.
Then, turn the blade around and do the same thing above, but in the opposite direction.
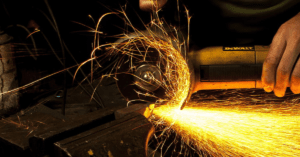
Start Sharpening the Saw
Once the setting is complete, it is time to sharpen the pruning saw. You only have to file the beveled edge, where the cutting teeth bend at a slight angle.
Use a tapered file for sharpening. Choose one that suits the size of your saw. Get a large file if it has bigger cutting teeth. Meanwhile, buy a small file to sharpen a pruning saw with coarse or fine teeth.
Begin by holding the file at the same angle as the cutting teeth. This is usually around a 30-degree point to the saw.
Then, take the file between each tooth to start sharpening the pruning saw. Use a single straight and forward motion when grinding the blade.
Avoid going back and forth to prevent damage to the saw. Instead, repeat doing straight strokes until you reach your desired sharpness. The number of strokes you should do depends on the blade condition: eight strokes are enough for regular touch-ups, 15 should suffice for a mildly dull blade, and 20 for a very dull or rusty saw.
Once you reach the tip, unclamp the blade. Turn it in the opposite direction before clamping it again and repeating the sharpening process.
Lubricate the Metal
After sharpening the pruning saw, you can clean it once again with a damp cloth.
Then, pour lubricating oil onto a clean cloth. Wipe it on the saw blade to protect it from rusting again.
Allow the lubricant or oil to settle on the blade for 30 minutes or overnight before using it again. You can take advantage of the sharp blade after the lubrication process. You will enjoy efficient cutting with the saw. You will also find that you do not need to use too much force while pruning branches.
How To Maintain a Pruning Saw?
While you can always sharpen a dull blade, it is best to focus on prevention instead of cure.
Maintain the sharpness of your pruning shears by cleaning them after every use. Wipe away dirt and debris with a clean, damp cloth. Use dishwashing liquid or WD-40 to remove the sap stuck on the cutting teeth.
Consider using a stiff brush, steel wool, or sandpaper to prevent rust from spreading quickly.
Then, pour a few drops of lubricating oil on the saw blade. Doing so protects it from corrosion and rust.
Finally, store the pruning saw in a dry, well-ventilated area when not in use. Avoid direct sunlight or moisture because they can speed up the deterioration of the metal components.
Conclusion
Cutting tree branches with a dull blade takes too much time and effort. It also increases the risk of injuries because a blunt saw can get caught in the wood. It is important to sharpen a pruning saw for your safety and efficiency.
To sharpen a pruning saw, prepare the necessary tools, such as work gloves, clamps, and files. Detach the blade from the handle with a screwdriver or wrench. Then, secure the blade on a clamp or vise before sharpening it using a file. Note that you may also need to set the teeth of the blade for even cutting.
Do you have other questions about sharpening a pruning saw? Visit our contact page to send your queries!