
If you want to transform plain metal into a decorative piece, you must learn how to engrave the material. Using the right tool is essential to achieve your desired results without compromising safety. With this in mind, we’ll show you how the Dremel Multi-Tool can help with this task.
A Dremel is a versatile device that can engrave on soft or hard metals, whether thick or thin. Use the proper bit accessory to create grooves, textures, or lines on the surface. You should also prepare the necessary tools and mark the area before carving the metal.
However, with so many Dremel bits available, it can be difficult to choose the right one. Below, we will teach you the features to look for in the bit accessory. You’ll also learn the step-by-step process of engraving metal with a Dremel.
How To Engrave Metal With a Dremel?
Whether you want to add logos on metal plaques or designs to your everyday household objects, a Dremel Multi-Tool can help you engrave metal. However, it’s easy to get confused if you haven’t tried carving before, let alone a Dremel.
Below, we will guide you through the step-by-step process of engraving metal with a Dremel Rotary Tool.
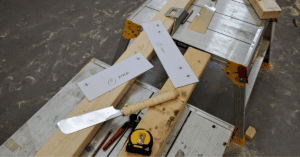
Prepare the Things You Will Need
First things first, prepare the tools you’ll need for metal engraving. These include the following items:
- Dremel tool
- The metal piece you will engrave
- Dremel engraving bits
- Pencil or marker
- Paper
- Acetone
- Center punch (optional)
- Clamp or vice for securing the metal
- Safety equipment (more on this in the next section)
Arrange all these tools on the working surface so that you can easily access them. It can also help speed up the process as you won’t be searching for a specific item in the middle of engraving.
Wear the Appropriate Safety Gear

When engraving metal, debris can fly at your face, and sharp edges might cut you unexpectedly. It is best to wear safety gear to prevent accidents and injuries.
Use a pair of safety goggles or any eye protection. It can keep your eyes safe from flying debris or sparks from the metal engraving process.
You must also protect your hands from cuts with work gloves. Choose a pair with thick and high-quality material to last you a long time.
If you have respiratory problems, consider wearing a dust mask or respirator. Doing so prevents you from inhaling metal dust while engraving metal.
Finally, you may want to wear a long-sleeved shirt when working with a Dremel tool. It can prevent debris and hot metal shavings from hurting your skin during the engraving process.
Choose the Right Dremel Bits

After preparing the necessary tools and safety gear, look for the proper bit attachment for your project.
Most Dremel accessories for engraving use metal, specifically carbide. They can handle soft metals, such as aluminum, copper, and thin sheet steel. Applications include fine lines to deep grooves, ideal for typical engraving projects.
If engraving harder materials like steel and brass, choose a Dremel engraving tool with a diamond wheel or diamond burr coating. This material can easily etch lines and other patterns on hard metal surfaces.
Those who need versatility and have enough budget can consider investing in a complete Dremel engraving accessory kit. The set has 11 different Dremel attachments that you can use for engraving wood, metal, and glass.
Mark the Area for Engraving
Once you have purchased the right Dremel engraving bit, it’s time to mark the area you wish to carve on.
Use a graphite pencil to draw the engraving design on the metal. Make sure the marks are clear and visible, as you’ll use them as a guide during the carving process.
If the surface is too smooth, consider using a marker (permanent or not) to identify the working area. Correct mistakes or remove unwanted inks with rubbing alcohol when you opt for the permanent marker.
You can even use a center punch to create shallow indents on the metal surface. These help you know where the engraving bit will start and end carving.
Choose the Patterns and Shapes to Engrave
If you want to carve complex patterns or personalized letterings on the surface, you’ll need more than a simple marking. You must transfer them to the metal sheet.
First, decide on the specific design you want. You can search for numerous templates online or create them on your own. Either way, you’ll need a sheet of paper for printing or drawing.
Next, place the paper with the design face down onto the metal surface. Use tape to secure it in place.
Then, pour a small amount of acetone on the paper. Doing so will transfer the design onto the metal sheet.
Gently remove the tape and paper from the flat surface and discard them. You now have the template on the metal piece! This will make it easier to engrave your desired patterns or shapes.
Set Up the Dremel Engraver
By now, almost all the prep work is done. There’s only one thing left—setting up the Dremel Multi-Tool.
With the device turned off, practice inserting and securing the Dremel bit. Read the product manual if you are unsure how to do it. But to give you an idea, you only need to place the bit attachment on the end hole. Remember to tighten the accessory for safety.
After that, plug the Dremel in. Know that the device has five settings, each one stronger than the last. For starters, turn it on to the lowest setting to get used to the device.
Feel free to try different ways of handling the Dremel. Grasp it with one hand or hold it with both palms—it’s your choice. However, make sure you have a secure grip for improved tool balance.
You can even use a clamp or vice to keep the metal from moving during the engraving process.
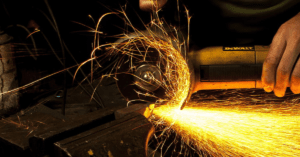
Start Metal Engraving
After familiarizing yourself with the Dremel Rotary Tool, you can begin engraving.
Maintain a firm grip on the device while keeping your loose wrist for flexibility. Start the Dremel on the lowest power setting.
Next, follow the marked lines or shapes using the tip of the Dremel bit. Trace the outline multiple times until you see the design takes form.
Then, gradually increase the speed of the Dremel to create grooves.
However, avoid putting too much pressure when engraving the metal. Instead, let the tool work on its own. In other words, simply guide the Dremel.
When you’re satisfied with the carving depth, reduce the speed of the Dremel. Carefully clean up the edges to ensure a smooth surface.
Turn Off the Dremel Tool
Once you have engraved the design, switch off the Dremel Tool. Unplug the device and let it cool for a few minutes.
When it’s already cold, remove and store the Dremel bit in the case. Clean the rotary tool with a damp cloth before putting it away. Doing these steps can help extend the life of the device.
Remember to perform thorough maintenance every quarter or year. You can check the product manual for instructions.
Conclusion
You can turn a piece of metal into a decorative item through engraving. The key is to use the right tool, like the Dremel, to achieve your desired patterns and shapes.
Engraving metal with a Dremel is relatively straightforward. Wear safety gear and pick the right bit attachment, and you’re all set. You can also follow our tips above to complete your project efficiently.
Do you have more questions on how to engrave metal with a Dremel? Leave us a message on our contact page, and we’ll get back to you soon.