
If you want to do a tile project, you know it can be difficult to cut tiles to fit your space. The tiniest amount of pressure can cause damage to the tiles. Having the right tool is essential to prevent problems, so we will explain how the Dremel Multi-Tool can help you with your task.
Dremel is a versatile and easy-to-use device for cutting tiles. All you have to do is prepare the necessary tools, mark the cut, and turn on the device.
You must also use the proper Dremel bit and technique because tiles can easily break with heavy pressure. Below, you will learn how to cut tiles with the right attachment. But first, we will show you why a Dremel is perfect for cutting tiles.
What Is A Dremel Tool?

Dremel actually refers to a popular multinational brand of power tools. It was established by Albert J. Dremel in 1932. Today, it is part of the Bosch Group.
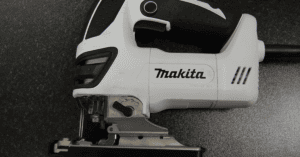
Most people use Dremel as a general term for the manufacturer’s wide selection of rotary tools. These devices are compatible with numerous bit attachments, making them suitable for various applications. One of these accessories allows you to cut ceramic tile and porcelain tile.
The Dremel uses both diamond wheels and bits for straight and curved cuts. It can also make detailed carvings, perfect for your home remodeling project.
Overall, the Dremel is an excellent alternative to consider if you do not own a tile saw or an angle grinder.
How to Cut Tile With a Dremel? A Step-by-Step Guide
Whether you need to divide a tile into two or make small carvings, this guide teaches you how to cut tile using a Dremel.
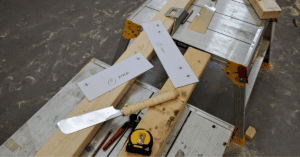
Prepare the Necessary Tools
Before anything else, arrange all the tools you will need for cutting ceramic tile or ceramic. These include the following items:
- Dremel Multi-Use Tool
- Dremel Cutting Tool Kit or specific Dremel bits (the exact accessory depends on your project needs)
- Pencil or any marker
- Rubber clamps
- Safety equipment (see next section)
Keep them in a single bag or working surface for easy access. Doing so can help speed up the cutting process.
Wear Appropriate Safety Gear

You must always use safety gear when cutting tile using a Dremel. You never know when a Dremel bit will break or when pieces of tile will shatter. So take the necessary precautions against accidents and injuries.
Wear safety goggles or any equivalent eye protection. These can keep your eyes safe from debris that may come straight at you.
You can also put on a dust mask to prevent inhaling debris while cutting the tile.
Wearing gloves is another must to protect your hands from the tile’s sharp edges.
Finally, consider using hearing protectors if you have sensitive hearing.
Mark the Cutting Area
After preparing the necessary tools and safety gear, mark the area you wish to cut.
Use a pencil or permanent marker to draw a line or shape on the piece of tile. You can also get a ruler to get straight lines.
If you do not have these tools, you can use paper cutouts to determine the cut.
We recommend covering the rest of the unmarked areas with masking tape or plastic. Doing so can prevent the adjacent tile, furniture, or any surface from getting dusty.
Remember that using a Dremel for cutting tiles can create a lot of dust. If you cover the other surface areas of the tile, you can prevent extensive clean-up after cutting. You will thank us later for this tip.
Secure the Tile Using Clamps
Once you have determined the type of cut you want, you can secure the tile.
This step only applies to loose tiles. When working with a fixed tile, you will have to make the cut directly on the wall or floor.
With that out of the way, place the loose tile on your workbench or any flat surface. Use a clamp to keep the tile upright when cutting. It can also prevent the material from slipping or moving while making a groove.
Any clamp will work for this type of project. However, we recommend rubber clamps to minimize scratches or damage on the loose tile.
When using metal clamps, you might want to place a piece of cloth between the tile and the clamps to reduce friction. Avoid putting too much pressure because it can lead to cracks.
Choose the Right Dremel Bit Attachment
Besides the working area, you must also prepare the Dremel Multi-Tool for the tile project. That means selecting the right attachment to use for cutting.
You can invest in the Dremel multipurpose cutting kit if you are not particular about the type of cut to make. The set already includes a couple of bit attachments, a cutting guide, and a user manual for your convenience.
However, consider a separate Dremel accessory to achieve a specific cut design.
For instance, the Dremel spiral cutting bit can help shape ceramic wall tiles in your bathroom or kitchen. It can also cut through cement board and plaster, but it is not suitable for floor tiles.
Meanwhile, a diamond wheel attachment is perfect if you want to cut thick floor tiles. This cut-off wheel also allows you to create straight grooves with minimal dust.
After choosing the right cutting bit, attach it to the Dremel. Use a screwdriver or wrench to tighten it to the Dremel tool. Ensure it is secure before moving to the next step.
Start Cutting the Tile
Once you have taken all the necessary preliminary steps, it is time to cut the tile.
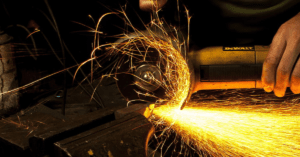
Plug in the Dremel Rotary Tool. Hold it with both hands for maximum stability before switching the on button.
Use the marked line or shape as a guideline when cutting the tile.
Keep a steady hand while working your way through the tile surface.
Avoid putting too much pressure on the Dremel cutting wheel. Instead, let the device do the task for you. Doing so can prevent the tile from cracking and the cutting bit from wearing out quickly.
When you get closer to the tile’s edge, slow down to prevent the tool from jerking or cutting past the marked line. And that’s it—you have already made a proper cut!
However, note that trimming a loose tile will feel different from fixed tile cutting. Below, we will briefly show you the differences when working with these two materials. We will also share some tips to achieve desirable results.
Cutting a Loose Tile with a Dremel
As previously mentioned, securing a loose tile with a clamp is essential before cutting.
Next, turn on and place the Dremel tool at the starting point of the cut. This spot is usually at the edge when cutting the entire piece or the center of the tile for removing portions.
Simply push the Dremel to the end of the loose tile for straight cuts. Or pull it out when you are near the cutting edge.
Use a tile repair epoxy kit to fix hairline cracks in loose tiles.
Cutting a Fixed Tile with a Dremel
You cannot cut through a fixed tile right away. You will need to create a hole first before making your desired cut.
That means you need to plunge the Dremel tool into the tile with both hands. Slowly push the bit to the surface at a 90-degree angle. The right angle attachment can help you make controlled cuts.
Start cutting, making sure to let the Dremel do most of the work. Stop the Dremel before it reaches the end of the cut line. Then, gently pull it out of the tile.
Make the Final Touches
You can always go back and make the final touches if you are not satisfied with the results,
Use a smaller Dremel tile cutting bit for this task. Yes, you will likely spend more time cutting tile with this tool. But on the upside, you can achieve a more polished finish. Avoid using too much pressure on the edge of the tile to prevent cracks.
You can also consider using sandpaper for smoothing the edges. It is ideal if you do not want to remove more hard material.
Turn Off the Dremel
After cutting and making the final touches, switch off the Dremel tool.
Unplug it from the socket and let it cool for several minutes. Avoid touching and removing the tile cutting bit because it is still hot from friction.
Finally, store it in a dry and secure area.
Conclusion
When doing a tile project for your bathroom or kitchen renovation, you will likely need to cut tiles. The Dremel is a versatile tool that can help you make straight or curved grooves on the tiles to fit your space.
Make sure to choose the right Dremel bit before cutting the tile for your project. You can also refer to our other tips above to cut tiles with a Dremel Multi-Tool.
Do you need more help cutting tiles using Dremel? Reach out to us by sending a message on our contact page.