
Nothing is more frustrating than using a table saw to cut angles for your woodworking project. Unlike a miter saw, this tool is difficult to move on an incline due to its blade orientation. Fortunately, there are a few ways that can make the task easier.
To cut an angle on a table saw, you must set the proper wood alignment. Then, adjust the saw blade to the appropriate height and angle before starting the cut.
However, you’ll need the necessary tools to complete the task, which we will show you below. This article also guides you through the steps of cutting an angle on a table saw. But first, let’s talk more about table saws and why use them.
What Is a Table Saw?

A table saw, also known as a bench saw, is a powerful woodworking tool. It features an electric motor that moves the arbor attached to a circular blade. This sharp blade extends above the table. The more the blade sticks out from the table, the deeper it cuts through the material.
A table saw has a workbench to support heavy materials during cutting. It can easily handle large wood pieces and soft metal sheets like aluminum and brass.
Table saws also come with an adjustable fence. This tool can secure the wood and control the cutting angle and width. It enables you to make angled cuts, crosscuts (cutting across the wood), and rip cuts (cutting with the wood grain).
Finally, a riving knife is a safety feature fixed to the table saw. It keeps the two pieces of cut wood from bumping into each other. It ultimately prevents kickbacks, which can lead to injury when uncontrolled.
What Are the Tools Needed When Cutting Angles on a Table Saw?
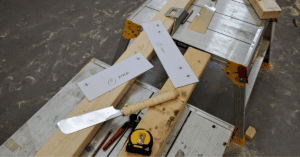
You’ll need specific tools to make angled cuts with a table saw. Ensure you have the following items on hand before cutting angles on a table saw.
- Table saw
- Speed square or drafting triangle
- Pencil
- Ruler or tape measure
- Miter gauge or taper jig
- Scrap wood pieces (optional)
Keep these tools in a small bag or on any surface. This way, it’s easier to access them when needed.
How To Cut an Angle on a Table Saw?
Table saws can cut precise angles on wood pieces. However, setting the blade at your desired angle can be challenging.
To help you, below are some tips on cutting perfect angles on a table saw.
Wear Safety Gear and Appropriate Work Attire
Cutting wood on a table saw could be dangerous. Sawdust and small wood chips may fly at your eyes, not to mention the table saw blade can get tangled.
Wear industrial-grade eye protection (safety glasses) to prevent wood debris from entering your eyes.
You must also use earplugs or earmuffs when working on a table saw. This woodworking tool produces loud noises that may eventually damage your hearing when exposed for a long time.
If you have a respiratory problem, wearing a mask or respirator is also necessary. Prolonged inhalation of particles generated by the table saw can lead to more severe health problems later.
However, avoid wearing gloves when cutting an angle on a table saw. These gloves just make you lose your sense of touch, which can be extremely dangerous. They also don’t stop the saw from cutting through anything it encounters.
You must also avoid loose clothing, flip-flops, and dangling accessories in the workshop. Instead, dress in tight-fitting clothes and closed-toe shoes.
These may seem a lot to remember. However, wearing the proper work attire is crucial for your safety. It can lower the risk of serious accidents and injuries.
Mark the Desired Cutting Angle
Place the wood to be cut on the table saw.
Next, determine the width and length of your wood using a ruler or tape measure.
Then, grab a pencil to mark the areas you want the angle cut. In general, workers cut the wood at a 90-degree or 45-degree angle. However, if you’re going to cut wood at a slope other than these angles (bevel cuts), you’ll have to adjust your markings manually. Use a speed square or drafting triangle to ensure the accuracy of the bevel cut.
Put a label on the face and edge of the wood. Remember that the edge will be the first part to make contact with the table saw blade. So double-check the start and end points of the cutting angles.
Finally, join these marked points and draw a thick, dark line across them. This outline would be your cutting guide when using the table saw.
Adjust the Angle of the Table Saw
After marking the wood to be cut, prepare the table saw for ripping.
First, set the appropriate saw height. The lower the blade height, the lower the cut angle. Meanwhile, a higher blade means a greater cutting angle. Turn the adjustment crank to raise or lower the blade under the workbench.
Then, adjust the table saw angle using a miter gauge or a taper jig. The former is ideal for cutting across the wooden board, whereas the latter can chip along the edges of the wood. Hence, the taper jig can help you make a bevel cut.
To use a miter gauge, hold it tightly. Position it against the flat edge of the speed square or drafting triangle. Then, move the gauge left or right to point to your angle measurement. Finally, rotate the handle clockwise to lock it in place.
When using a taper jig, you must open it to set the desired angle cuts. Press the wood against the edge of the jig. Next, use a ruler to calculate the distance between the jig and the ends of the cut. Take note of the measurement and position the wood accordingly.
Position the Table Saw Fence
You will find a metal bar, called a fence, in most table saws. This part is an integral safety feature. So, make sure to set it in its proper place to secure the wood.
First, remove the speed square or drafting triangle out of the way.
Then, slide the rip fence along the table saw to fasten the miter gauge and taper jig to the wood. It can also prevent the wood from moving while cutting angles.
If your table saw lacks a metal fence, you can create your miter gauge fence with scrap wood. Attach it to the clamp on the back of the taper jig.
Cut the Wood on an Angle
Before making the actual cut, perform a trial cut on a scrap piece of wood. Use this chance to check if the saw and gauge are in the right position. Adjust the angle as needed.
Once you’re sure the table saw cuts the sample wood cleanly, proceed to cut the actual wood. Stand behind the board you intend to cut instead of the saw blade.
Then, hold the rip fence and the wood with your dominant hand. Slowly push the board towards the blade to make an angled cut. Pull it back once the saw cuts all the way through the wood.
Finally, check the angled cut on the wood to ensure it meets your desired result. Consider doing a recut if it doesn’t look right or feel smooth.
Conclusion
A table saw is a powerful tool for cutting large wood pieces. While it is not designed for angles, it can give precise slopes ideal for your woodworking project.
To cut an angle on a table saw, mark the areas you intend to remove. Then, adjust the height and angle of the saw accordingly before securing the wood with a fence. Remember to wear safety gear to protect yourself from injuries.
Do you have more questions about using a table saw? Drop a message on our contact page if you need specific help.