Have you noticed your table saw takes longer than usual to cut through a piece of wood? Replacing blades regularly is essential to keep you safe and maintain optimal performance.
To change a table saw blade, you’ll detach it from the base plate. Next, use a wrench to loosen the arbor nut that secures the blade to the workbench. Remove the blade and swap it with a new one.
If you don’t have a wrench, you can replace a dull saw blade using other methods listed in this article. Below, you will also learn the step-by-step process of changing the table saw blade. But before anything else, let’s look into the types of saw blades to help you understand them.
Table Saw Blade Styles
Table saw blades come in four main types—general purpose, ripping, crosscut, and combination. Each type is suited to cutting a specific material.
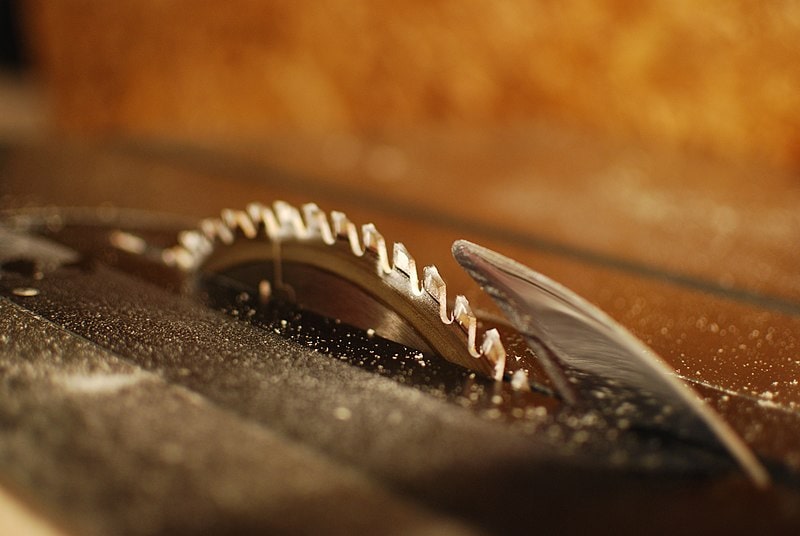
- General purpose blade – These are the most common blades because they handle different tasks. They have between 40 to 50 teeth, with deeper gullets.
- Rip blade – These blades cut the material following its natural grain. They come with 24-30 wide teeth, ideal for ripping wood.
- Crosscut blades – They use around 80 to 90 teeth to cut across the wood grain.
- Combination blade – Commonly called multi-purpose blades, they have 50 to 60 cutting teeth. These make them suitable for manufactured materials.
These table saw blades cut efficiently when paired appropriately with materials. However, they eventually get dirty and dull. It is essential to replace them for maximum performance and safety.
Tools You Will Need to Change a Table Saw Blade

You need the right tools to change a table saw blade. Prepare the following before touching the old or dull cutting teeth.
- New table saw blade for replacement
- Regular wrenches
- Allen wrench
- Screwdrivers
- A pair of pliers
- A small block of scrap wood
Place these materials on a surface near the table saw, so you can easily access them.
How to Change a Table Saw Blade? 9 Easy Steps to Follow
Replacing a table saw blade is relatively straightforward. However, you must follow the necessary precautions to prevent injuries and accidental damage to your power tool.
Below, we have outlined the steps to changing a table saw blade.
Turn Off the Table Saw
Before doing anything, you must switch off the table saw. The last thing you want is the blade to turn on accidentally and slash a finger or two.
In addition, make sure the table saw is unplugged and without power for extra safety. Wait a few seconds to ensure all power drains from the electric table saw.
Remove the Blade Guarding System

After turning the table saw off, you can remove its guarding system to access the blade. Depending on your saw design, you’ll find a throat plate and a blade guard. The former provides space for the blade to rise above the table. Meanwhile, the latter is a safety feature that prevents your hands from getting close to the cutting teeth.
Detaching these parts from the saw varies from model to model. Consult the user manual of your table saw to learn how to remove the throat plate and blade guard.
But to give you a general idea, you must unscrew the screws holding the blade guard secure. Use an Allen wrench to separate the splitter and kick-back safety features attached to the blade guard.
To remove the throat plate, loosen the leveling screws and turn the lock knob.
Lift the Blade
With the blade guard and throat plate out of the way, you can now access the blade.
Wear gloves to protect yourself from the sharp blade. You may also want to put a small wood block against the blade to prevent it from turning.
Then, slowly lift the blade to its highest position. Doing so allows you to reach the internal parts of the table saw.
Loosen the Arbor Nut
After you raise the blade, you can see the shaft where it is mounted. This part is known as the arbor.
You must remove the nut and washer that act as the arbor lock mechanisms. Use the wrench that comes with most table saws. You can grab two regular wrenches if your power tool does not have a wrench.
Turn the wrench to the left or in an anti-clockwise direction to loosen the arbor nut.
Remove the Arbor Nut
After the nut is loose, remove it completely with your hands. Hold the end of the arbor with your index finger to prevent the nut from falling into the changing table.
After the nut is free, you can pull out the washer.
Store the arbor nut and washer in a secure place to prevent them from getting lost.
Replace the Old Blade With a New Blade
First, note the orientation of the old blade, so you can install the new blade in the proper position.
Gently remove the old blade from the table saw. Place it on another surface to wash or dispose of later.
Get the new blade and attach it to the arbor. Ensure they are fixed properly. To tell if they are facing the right side, the cutting teeth must be pointing toward you.
Tighten the Arbor Nut
After you install the new blade on the table saw, you can put the washer and the arbor nut back in place.
You must first mount the washer with your fingers.
Then, screw and tighten the nut using one wrench to make sure the saw blade is secure.
Reassemble the Table Saw
With the new blade installed, you can now reassemble the parts you removed earlier.
Start by lowering the blade to the table. Use the hand wheel under the saw to adjust the blade height.
Next, replace the throat plate. Tighten the leveling screws and switch the knob to its locked position.
Finally, reinstall the blade guard. Use a screwdriver to secure this safety component on the table saw.
Reconnect the Power
Once you have assembled the table saw, plug it into the wall outlet. Turn on the motor to operate the blade.
Check if the blade is running correctly. If not, switch off the table saw and make the proper adjustments. Raise the blade to its maximum height again and loosen the nut. With the washer removed, you can follow the same method on how to change the blade above.
Frequently Asked Questions
When should I change my table saw blade?
One of the tell-tale signs that you need to change your table saw blade is chipped or broken teeth. These can lead to a chip or tear-out edges on the wood. Immediate replacement is a must to ensure the blade cuts smoothly through the material.
You must also change the blade if you feel increased resistance when pushing the material. This friction indicates a dull blade, which requires a lot of force to make the cut.
Other signs the blade needs replacement include loud motor noise, burn marks on the material, and, worse, smoke.
How do you change a table saw blade without a wrench?
Although difficult, changing a table saw blade is possible without using the wrench included in the table saw.
You can use a wooden block to prevent the cutting teeth from turning. Then, grab a regular adjustable wrench to loosen the arbor nut.
You can also buy a blade lock to hold the cutting teeth in place. Simply place the lock over the blade to stop it from turning. Use a regular wrench to release the nut as usual.
Which direction should you turn to release the table saw blade?
Turn the wrench to the left side or in an anti-clockwise direction to loosen the arbor nut. Then, release the table saw blade from its fixed position. You can now replace it with a new one.
To tighten the arbor nut, turn the wrench in reverse to the right or clockwise. Doing so can lock the blade in place while you cut different materials.
Conclusion
A table saw can quickly cut through different materials. However, the blade may become dull over time, which leads to ragged and uneven cuts.
To ensure optimal performance, you must change the table saw blade. Remove the blade lock and raise the cutting teeth. Then, loosen the arbor nut to replace the blade with a new one.
Did you find this article helpful? Let us know by leaving a message on our contact page.


